
Color presets
The color preset system is a powerful tool for effortlessly configuring the visual aspects of water. It offers a range of predefined presets, eliminating the need to create new material instances to modify scattering and absorption.
Before starting to change the color of the water, make sure the surface is configured correctly. The SurfaceActorReference attribute in the Domain actor you use (SimulationDomain or CoastlineDomain) should reference your surface actor. Otherwise, the domain will spawn a temporary water surface that can’t be configured by hand.
Changing surface color
- Select the surface actor on your map.
- In the MeshRendering tab, find the BaseColorPreset attribute.
- You can use any preset from my list of predefined colors or create a duplicate and modify it.
Creating a custom color preset
Many pre-configured color presets are available for oceans, shallow water, and rivers. Additionally, users can create their own water presets by duplicating existing examples and adjusting the parameters as desired, allowing for seamless customization and experimentation.
In the Content Browser, open the folder /FluidFlux/Content/FluidFlux/Surface/Templates/Color/
Find a data asset preset closest to the effect you want.
Duplicate the chosen data asset.
Set the data asset in the surface rendered on your map (attribute BaseColorPreset).
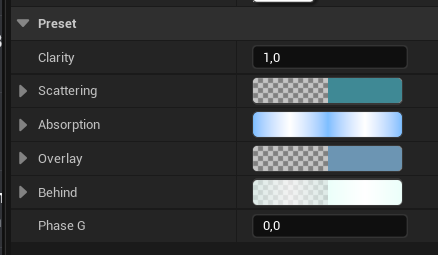
Open the data asset and edit the parameters:
Modifying Color Presets with Editor Preview
As you may notice, editing the Color Preset through the Surface Actor does not automatically update the surface itself. This is because data assets cannot communicate with the surface actor in a way that allows them to broadcast changes directly.
To solve this, Fluid Flux provides a dedicated tool called OpenSurfaceEditorTab, designed specifically for editing Color Presets applied to the surface with live editor preview.
You can find and run this tool from the Details panel of the selected Surface Actor.
If OpenSurfaceEditorTab does not appear after clicking the button, make sure the Python plugin is enabled in your project (Edit → Plugins). It is required for opening editor tabs.
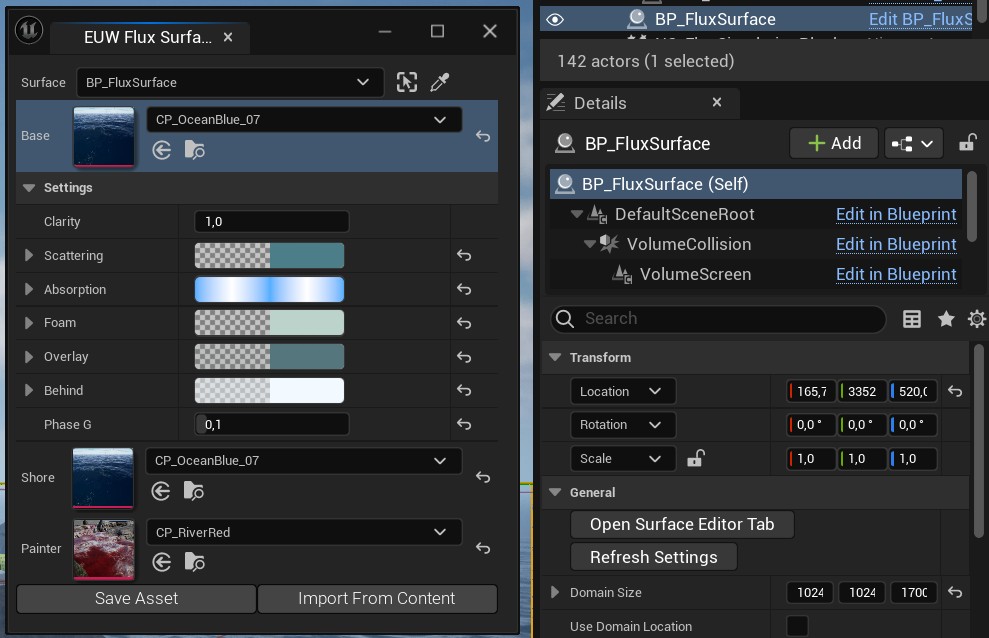
Using the new editor is straightforward:
- Select the Color Preset from the Surface that you want to edit.
- Expand the Settings parameter section and make your changes.
- When you are done, click Save Asset.
- To import data from another data asset, use Import From Content.